Posted on

Guide to Storing Your Caravan for Winter

As winter approaches, it’s crucial for caravan owners to prepare their vehicles for storage. Proper winter storage not only preserves the condition of your caravan but also ensures a smoother start to the next camping season. Here’s a quick guide with 10 key actions to take when storing your caravan for the winter.

  1. Thorough Cleaning: Before tucking your caravan away for the winter, give it a thorough cleaning. Wash the exterior to remove dirt, grime, and any accumulated road salt. Clean the interior, including cabinets, appliances, and surfaces. A clean caravan is less likely to attract pests, and it provides a fresh start when you’re ready to hit the road again.
  2. Appliance Maintenance: Check all appliances inside your caravan and ensure they are clean and in proper working order. Empty and clean the refrigerator, leaving the door ajar to prevent mould growth. Clean cooking appliances, and ensure all electronics are turned off before storage. This not only maintains the appliances but also prevents potential hazards during storage.
  3. Water System Winterization: Properly winterise your caravan’s water system to prevent frozen pipes and potential damage. Drain all water tanks, including the hot water heater, and open all taps to remove any remaining water. Use RV antifreeze to protect against residual water in the pipes. Don’t forget to flush the toilet and pour antifreeze into the holding tanks.
  4. Gas System Precautions: Safely shut off the gas supply to your caravan to prevent leaks during storage. Ensure all gas appliances are turned off, and disconnect gas cylinders. Store cylinders in a secure, well-ventilated area, away from direct sunlight and potential ignition sources. Check for any signs of gas leaks before storing.
  5. Tyre Care: Take care of your caravan’s tyres to prevent damage and maintain their integrity. Inflate the tyres to the recommended pressure, and consider using tire covers to protect them from the elements. If possible, elevate the caravan slightly using levelling blocks to reduce pressure on the tyres. Rotate the tyres periodically to prevent flat spots.
  6. Interior Protection: Protect the interior of your caravan from potential damage during storage. Close all windows and curtains to prevent sunlight from fading fabrics. Use reflective window covers to minimize heat buildup inside. Consider placing moisture-absorbing products, such as silica gel or dehumidifiers, to prevent condensation and inhibit mold growth.
  7. Exterior Maintenance: Conduct a thorough inspection of the exterior for any signs of damage or wear. Repair any cracks, leaks, or loose seals. Apply a protective wax or sealant to the exterior surfaces to shield against harsh winter weather. Ideally, cover the caravan with a breathable, weather-resistant cover to prevent exposure to the elements.
  8. Battery Care: Properly care for your caravan’s battery to ensure it remains in good condition during the winter months. Fully charge the battery before storage, and disconnect it to prevent drainage. Consider using a battery maintenance charger to keep it in optimal condition. Store the battery in a cool, dry place away from extreme temperatures.
  9. Secure Storage Location: Choose a secure and suitable storage location for your caravan during the winter. Opt for covered storage if possible to shield the vehicle from the elements. Ensure the storage area is well-ventilated and has adequate security measures in place to deter theft or vandalism. If storing at home, park on a level surface with chocks to prevent movement.
  10. Documentation and Inventory: Before storing your caravan, document its current condition and create an inventory of items inside. This will help you identify any missing or damaged items when you retrieve your caravan in the spring. Keep important documents, such as insurance papers and registration, in a safe place accessible to you but secure from potential theft.

Conclusion:

Properly storing your caravan for the winter involves a series of thoughtful actions to preserve its condition and ensure a trouble-free start to the next camping season. By following these 10 key steps, you’ll not only protect your investment but also set the stage for memorable adventures when the warmer months return. Remember, the effort you put into winter storage pays off in the longevity and enjoyment of your caravan.

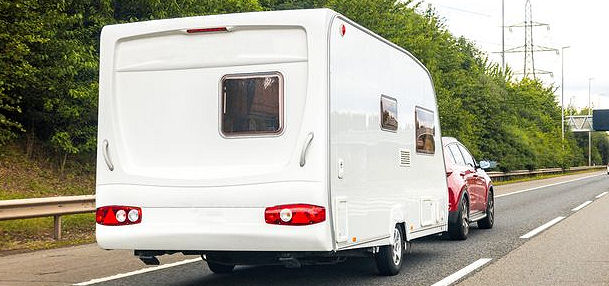
Posted on

Checks to make before going away in your caravan

getting ready to go caravanning

Embarking on a journey with a caravan can be an exciting and enjoyable experience. However, ensuring that your caravan is in optimal condition before hitting the road is crucial for a safe and hassle-free trip. Conducting thorough checks and maintenance routines can prevent potential issues and guarantee a smooth travel experience. In this article, we will discuss the essential caravan checks you should make before setting off on your adventure.

  1. Tires and Wheels:

Start by inspecting the tires for any signs of wear, cracks, or bulges. Check the tire pressure and ensure it matches the recommended levels provided by the manufacturer. Pay attention to the wheel nuts and tighten them to the specified torque. Additionally, verify that the wheel bearings are properly greased and in good condition.

  1. Lights and Electrics:

Check all external lights, including indicators, brake lights, and headlights, to ensure they are functioning correctly. Test the electrical connections between the towing vehicle and the caravan, ensuring that the brakes and indicators sync properly. Carry spare bulbs and fuses in case of any failures during the trip.

  1. Brakes and Coupling:

Inspect the brakes to ensure they are in proper working order. Test the handbrake, as well as the breakaway cable, which activates the caravan brakes in case of accidental detachment. Verify that the coupling mechanism is secure and that it is properly connected to the towing vehicle.

  1. Gas and Water Systems:

Examine the gas supply and check for any leaks. Ensure the gas cylinders are securely fastened and that the gas system is correctly connected. Inspect the water system, including tanks, pumps, and pipes, for leaks or damage. Fill the water tanks and check that the water pump is functioning correctly.

  1. Exterior Body and Windows:

Inspect the exterior of the caravan for any signs of damage, such as cracks, dents, or loose fittings. Pay attention to the windows, seals, and doors, ensuring they close tightly and are in good condition. Replace any damaged or worn-out seals to prevent water leaks during rainy weather.

  1. Interior Checks:

Inside the caravan, check the condition of all appliances, including the stove, refrigerator, and heating system. Test the gas, electricity, and water supply to each appliance, ensuring they are functioning correctly. Check the condition of the upholstery, curtains, and carpets, and address any necessary repairs or cleaning.

  1. Safety Equipment:

Ensure that your caravan is equipped with essential safety items. Check the fire extinguisher to verify it is within its expiration date and in good working condition. Test the smoke and carbon monoxide detectors and replace the batteries if needed. Additionally, ensure you have a fully stocked first aid kit readily available.

  1. Weight Distribution:

Check the weight distribution of your caravan to ensure it is within safe limits. Avoid overloading the caravan, as this can lead to poor stability and handling. Consult the manufacturer’s guidelines or seek professional advice if you are unsure about weight distribution.

  1. Hitch and Stabilizers:

Inspect the hitch and couplings for any signs of wear or damage. Lubricate the moving parts to ensure smooth operation. Test the stabilizers and sway control mechanisms to guarantee they are functioning correctly, as they play a crucial role in maintaining stability during towing.

  1. Documentation and Insurance:

Finally, ensure you have all the necessary documents with you, including your driver’s license, vehicle registration, and insurance papers. Review your insurance coverage and ensure it is up to date and appropriate for your trip. Consider additional coverage options if required.

Conclusion:

Before embarking on a caravan adventure, it is essential to perform a comprehensive set of checks to ensure the safety and functionality of your vehicle. The caravan checks mentioned above cover crucial aspects such as tires, brakes, electrics, gas and water systems, body and windows, interior condition, safety equipment, weight distribution, hitch, and documentation. By investing time and effort in these pre-travel inspections, you can minimize the chances of encountering unexpected issues and enjoy a worry-free journey with your caravan. Remember, safety should always be the top priority, so never compromise on performing these essential checks before hitting the road.

Posted on

Black Mould Control

Black mould is a common problem in caravans, especially in damp or humid conditions. This type of mould can cause health problems, including respiratory issues and allergies, and can also damage the structure of the caravan. Preventing and removing black mould is essential to maintain a healthy and safe living environment in your caravan.

Steps to Prevent Black Mould in Caravans

  1. Proper Ventilation: One of the most effective ways to prevent black mould is to ensure proper ventilation. Open windows and vents regularly to allow air to circulate and reduce moisture buildup. Consider installing a fan or ventilation system to improve air flow.
  2. Fix Leaks: Any leaks or water damage should be repaired promptly to prevent mould growth. Check for leaks around windows, doors, and plumbing fixtures, and have them fixed as soon as possible.
  3. Use a Dehumidifier: A dehumidifier can be an effective tool in reducing moisture levels in the caravan. This will help prevent mould from growing and spreading.
  4. Clean Regularly: Regular cleaning with a mould-killing cleaner can help prevent mould growth. Make sure to clean all surfaces, including walls, ceilings, floors, and furniture, to keep the caravan free of mould.
  5. Keep Surfaces Dry: Wipe down surfaces regularly and use fans to help dry out any damp areas. If you notice any moisture, try to dry it up as soon as possible to prevent mould from growing.
  6. Check Seals: Make sure that seals around windows and doors are intact to prevent water from entering the caravan. Replace any damaged or worn seals to keep moisture out.
  7. Remove Mouldy Materials: If mould has already developed, it is important to remove any mouldy materials and clean the affected area thoroughly. This can include replacing drywall, flooring, or other materials that have been contaminated.

Steps to Remove Black Mould in Caravans

  1. Identify the Source of Moisture: The first step in removing black mould is to identify the source of moisture. This could be a leak, condensation, or another source of water. Once you have identified the source, take steps to eliminate it.
  2. Wear Protective Gear: When removing black mould, it is important to wear protective gear, including a mask, gloves, and goggles, to protect yourself from inhaling spores.
  3. Clean the Area Thoroughly: Clean the mouldy area thoroughly with a mould-killing cleaner. Follow the instructions on the cleaner carefully, and make sure to protect yourself with gloves and a mask.
  4. Dry the Area: After cleaning the area, make sure to dry it thoroughly. Use fans or open windows to increase air flow and speed up the drying process.
  5. Dispose of Mouldy Materials: Dispose of any mouldy materials, such as drywall or carpet, that cannot be cleaned. Make sure to double-bag the materials and dispose of them properly to prevent mould from spreading.
  6. Prevent Future Mould Growth: Once the mould has been removed, take steps to prevent future mould growth. This could include installing a dehumidifier, improving ventilation, or making other changes to reduce moisture levels.

Conclusion

Black mould can be a serious problem in caravans, but it can be prevented and removed with the right steps. By following these guidelines, you can maintain a healthy and safe living environment in your caravan, free of mould and other allergens. If you have any concerns about removing black mould, it is best to consult a professional for assistance.